Showing posts with label diy. Show all posts

Sunday, April 28, 2013

Redo Ugly Door Mirrors

I had ugly mirrored closet doors that had a "brass" look.  If I replaced them with solid doors or screen panel doors it might of made my room seem smaller and would of cost a pretty penny too.  Also I have to admit, I like having such handy mirrors when I'm trying things on.  I was so tired though of the mirror doors and looked online for ways to transform them.  I could of took them down, taped off the mirrors and spray painted them.  However, I did this project when it was still too cold to spray paint outside.  
 
This is how they looked before


How I transformed them to this new modern white look~
 
1. I took and lightly sanded the door trim to "rough" the surface to hold paint. 
2. I taped off the mirror around the trim to keep paint off the mirror.
3.  I used some Kilz Semi-Gloss Interior/Exterior paint in white that I had left over from painting our son's room.  It said it was good on most surfaces including metal so I thought it'd stick well.
4.  I used a small sponge brush to paint it on and did at least two coats.  It does seem to be holding pretty good and I think they look much better!   I have to say my husband and I don't exactly abuse our closet doors.  We open and close them easily and no children use them.  I am not sure how well this paint would hold up to doors that have more wear and tear. 


I was ready to remove this fake wood framed mirror on our bathroom door.  Again I use the mirror and if I removed it I'd have to replace it as there would be screw holes in the door.  So I pondered on this a bit, not finding much online to help me transform it.  I finally decided to look at rick rack in the fabric section at Walmart to hide the wood frame.  I wasn't sure what would be available.  The rick rack was not wide enough.  So I then saw some reduced price wide ribbon (2.7 m) by the spool for a measly 50 cents.  I estimated that I needed about 10 feet of ribbon and since the spools had 3 yrds on them I was lucky to find 3 of the same cream colored, polyester textured.  (I did however, only used 2 rolls).  I also wanted an accent color.  Since my bathroom has blues and grays, I looked at those two color schemes.  And even though I had to pay full price I still got a spool of  18 ft for less than $2 in a steely gray.  This was slightly thinner at  7/8" 


First I measured and cut the wide ribbon.  Then using a hot glue gun I applied glue to the back of the ribbon and pressed onto the mirror.  This has to be done quickly as the glue dries quickly.  Just be sure to cover the mirror holders and try to lay ribbon evenly. 

I next cut the gray ribbon and hot glued it on top of cream colored ribbon carefully centering and running straight.  I did try and angle the corners to fit together which was kind of tricky to do by eye only.  It didn't match up exactly but was very close and I used hot glue to "seam" corners together.

This was the fun part.  I looked for things to hide my seams and found some buttons and jewelry pieces to hot glue on the corners then on the top of the mirror.  I think it turned out pretty shabby chic!

Monday, March 04, 2013

Daisy Duke's General Lee # 01 Dog Tag

I saw a tag like this on Etsy for about $12 and it had sold :(  so I decided to make our Daisy Duke one myself. 
On a sheet of scrap tin I traced a circle.  Then I used wire snips to carefully cut out the circle.  I wore work gloves for this as the tin is very sharp. 
I also took an awl and made a hole at top for the tag to attach to collar with.
Then I used some fluorescent orange paint to spray paint front and back.  I stuck white foam numbers to collar while paint was wet. I then took a black sharpie and collored in the numbers so outside edges were still white. 
Daisy already has a tag with her name and our phone number on it or I would have used a fine sharpie to write that info on back of tag.
Preferably I would of liked to had heavier gauge metal and a circle punch and I would have preferred to have a stamp for the numbers but I used what I had.  I'm not sure of the durability of this yet. 
I will see if it lasts and hopefully get her an orange collar.  One with a rebel flag would be cool.


Thursday, February 14, 2013

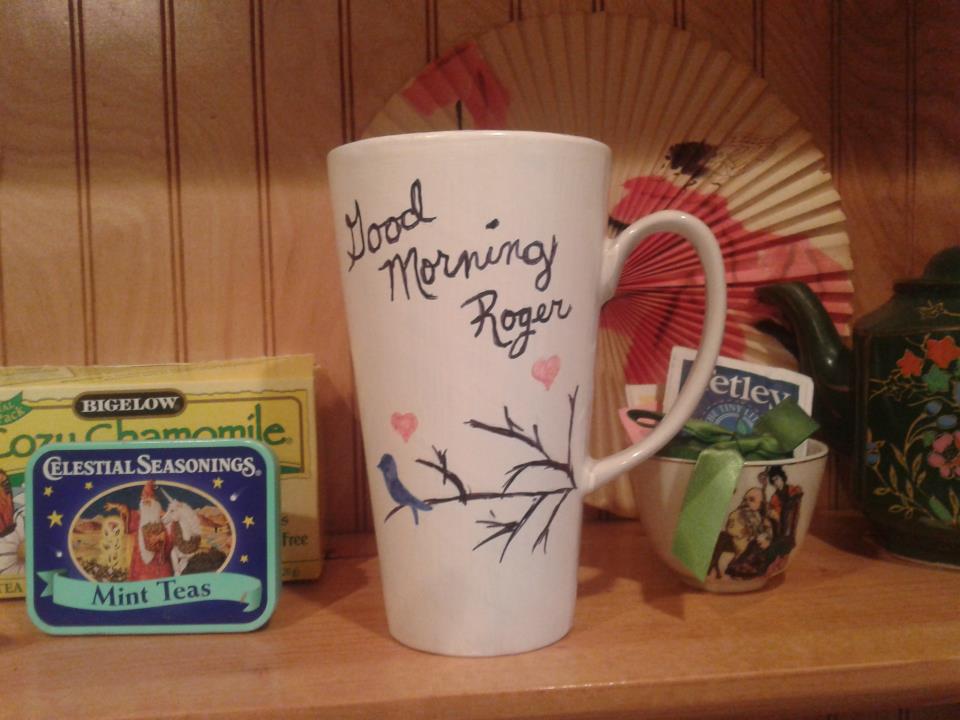
Ceramic Mug Repurposed with Acrylic Paint and Sharpies

I had grown really tired of these Christmas striped mugs.  We liked to use them cause they are the perfect size.  I read up online about painting Ceramic and lots of people were using enamel paints.  Then at ehow I found instructions for painting with acrylic paints.  So I had at it on one of our mugs for my husband's valentine's day gift.  
1) I took and laid the cup upside down on a newpaper (and I learned after I painted it that the paper stuck to the cup, so I switched to wax paper) I had to paint at least 3 coats of white to cover the stripes. I used a little foam brush and a small bathroom cup to hold the acrylic paint.
2) I let it dry about an hour after final coat.
3) I pencil drew my design. 
4) When I was happy with that I used sharpies to finish. 
5) Next I put it in cool oven at 325* for 30 mins. (do not preheat as the ceramic might crack)
5) Finally turn oven off and let cool in oven for about 20 mins. 
6) It must cure for 72 hours before using.  I haven't tested mine yet but hopefully it will be durable for dishwasher. 

Wednesday, December 12, 2012

The Missing Piece

If you have children or grandchildren you may have a puzzle with a missing piece or two.  This happened with my grandson's spongebob puzzle.  So we took a piece of stryofoam plate, laid it under the spot where the missing piece went.  Then traced, my artistic son drew the puzzle piece onto stryo piece, my grandson and I colored it in with matching markers and then we cut it out.,  Tada... can you see it?  It's the shoe on right side of puzzle.  Pretty tough to spot, huh?

Sunday, December 09, 2012

DIY Christmas


So I'd really been going to town creating and being inspired by pinterest.  I still have some gifts I will be working on to come.  But here are a few projects I've dabbled with.
This was an old faded bamboo wind chime.  Here I had replaced the weathered string and spray painted the wood white.

I made a template on masking paper of a star to match the star on my Santa Claus (see below) that I was going to hang in center.  I cut star out with an x acto knife and spray painted the star onto the top on four different sides.

this is a wooden Christmas ornament that was in our Christmas ornament collection.  it worked perfectly, since I'd lost the middle piece of wood that was on the chime.

Here is the completed chime, even though the stars are not as visible in this picture.
This shows the stars but not the santa claus.  Can't have everything! 
 

Another pinterest inspiration.  branches I cut from a bush, spray painted with the fake snow paint, added to a clear vase, with ribbon and a few small red ball ornaments. Ta da...Easy!

a basket I got as a gift last year.  most of the year, it's in a cupboard holding my small lids to my glad wear but here i brought it out and added just some silk poinsettias, some gold ribbon and a pretty embroidered heart ornament.

 
this too was a pinterest inspiration.  however, I didn't want to make it too complicated.  I just used some red ribbon and looped over each section of chandelier, tying a ball ornament to each end.  I cut at different lengths, but didn't measure (just eyed it)  I hope to add more balls (which I hope to get at an after Christmas sale) next year for a wider span.  I used a combination of red and gold with one glass ornament that was a gift.  Definitely a simplified version but still took some time and patience. 
Easy no water snow globes.  Save either glass or plastic jars.  I used  plastic for my grandsons to play with, and glass for my own decorating.  I spray painted lid, bottom and inside either gold or silver.  I glued little miniatures with hot glue onto lid.  I then used some fake snow that was also sparkly (so I didn't need glitter too) Put lid on and shake up. Some of the glitter/snow sticks to the sides of jar because of static.  Really cute and easy.
Homemade ornament wall Christmas tree.  I didn't want to put up a big tree this year.  I actually only put up the top of our artificial and sat it on table top on deck in front of picture window.  I do not like the hassle of a big tree.  It seems my tree gets smaller as I get older.  Especially since my daughter who loved to decorate has her own home and tree to decorate.  And the boys in my family don't seem to get the joy from putting one up and decorating ...basically it is like pulling teeth.  So since the homemade ornaments are my favorite part I cleared a wall and started taping ornaments in a tree shape to wall.  It turned out kind of cool, I thought.  Only thing is almost everyday I hear a kerplunk as one falls off.  Nothing is breakable...thank goodness. I have tried masking tape and double sided tape, more masking tape and they still fall.  I just rehang them when they fall :)  I also filled in some empty spots with pretty bows. 

12 days before christmas tins, altoid tins with mini donuts(cheerios with icing and sprinkles), ornaments, candy, bugs, pet prayer rocks with instructions. etc.


I made these with my two grandsons for their parents.  I made salt dough ~ 1/2 cup salt, 1/2 cup flour, 1/4 cup water (as needed to make a soft dough)  roll it out, make hand impression. Next cut around edges of hand impression, use a straw or pen top to put a hole at top.  bake at 200F for 3 hours.  I let it continue to dry out overnight, then painted.  don't forget to have child write name (or do yourself) and year on back.  put a ribbon for hanging at the top.  My grandsons were so excited to give these to their mom and dad! 


Friday, November 02, 2012

Diy stain spray


Fill an empty squirt bottle with equal parts
Water
Ammonia
1/4 C Laundrey Soap

Spray on stain

Monday, October 22, 2012

DIY Antibacterial Kitchen Counter Cleaner

So I ran out of Lysol Antibacterial Kitchen Cleaner which I use on my kitchen counter tops.  I decided to use what I have on hand and this is the formula I decided to try.
The miracle product as in many cleaning supplies is vinegar.  But don't rule out peroxide or bleach.  I just chose vinegar (despite its bad smell) because it doesn't bleach things out like the prior mentioned.  So here's my simple recipe and it doesn't smell too strong since it's diluted and has a citrus scented dish soap.


Antibacterial Kitchen Counter Cleaner
  • empty (reuse old bottle) spray bottle
  • fill bottle 1/2 of vinegar
  • fill bottle 1/2 of water
  • 1T scented dishsoap

Other kitchen hints~ 
For cleaning microwaves, just pour a little lemon juice into a bowl of water and microwave it for a few minutes.  This will deoderize and help wipe down grim in microwave. 
Finally, if your sink is clogged or smelly, try pouring 1/4 cup of that old baking soda that needs replaced for freshing your refrig or freezer (write date on so you know how old it is, I save mine 6 months) down the sink, then add 1 cup of vinegar and cover the drain tightly.  It will bubble up and freshen drain and help drain better.

Saturday, October 13, 2012

Window Film for Privacy and Dog Smudges


We have a patio door that opens into our main living room.  It is so frustrating because whenever the neighbors come down their driveway their headlights shine right into our living room.  Also I could see all the smears from not cleaning it good enough.  Well, I got over this.  But then we got a new dog and she smudges it with her big nose and big slobbers.  She is a american bull dog/ st. benard mix.  She is way more slobbier than our previous border collie/ sheperd mix.  I was going to attempt some diy window film but felt I was not artistic or patient enough.  So I found this one on Amazon with a bamboo print that goes pretty well with our decor.  With help from the husband, who has applied tint to many a car window we got it done pretty easily.  I have to say, even though we opted to do only one window, since the other is always blocked by our bamboo shades, it looks pretty good.  Even though Daisy will have to peak behind the bamboo to see the outside cats or anyone approaching the front door, it's a great choice. 
This is our previous dog looking at the cats from our patio door.  you can imagine the doggie nose prints!
This is the door minus the grid and with our new bamboo window film

Wednesday, October 03, 2012

Halloween Ideas


Spongebob haypants. I made this for grandsons at Halloween. I'm really not into the spooky stuff anymore but saw this idea at Amish Acres. http://www.amishacres.com/ I have a friend that graciously gave me two bails of hay. I then had my son stacked them on top of one another. If you have something to hold them together, like placing dollrods between them, this may prevent a tip over...mine actually stayed upright for quite some time. The mouth, shirt, tie and pants were painted on using cheap spray paint for about $1 at dollar store. I used two wiffle balls painted with blue eyes and secured with some wire to twine that wraps around hay. Also I used a plastic banana stuck into the hay for a nose. For the arms and legs I had a broken rake and a broken broom stick that I spray painted yellow. Added some gloves secured by rubberbands and some black boots. Or if you want to get complicated you can make some boots out of paper mache. My teenage son was the heavy lifter of the hay! And the grandboys got to help and they thought it was cool!
Here are my painted pumpkins from one year with a cat following two mice.

Our little mummy.  Tore an old bed sheet into long strips and wrapped away. 
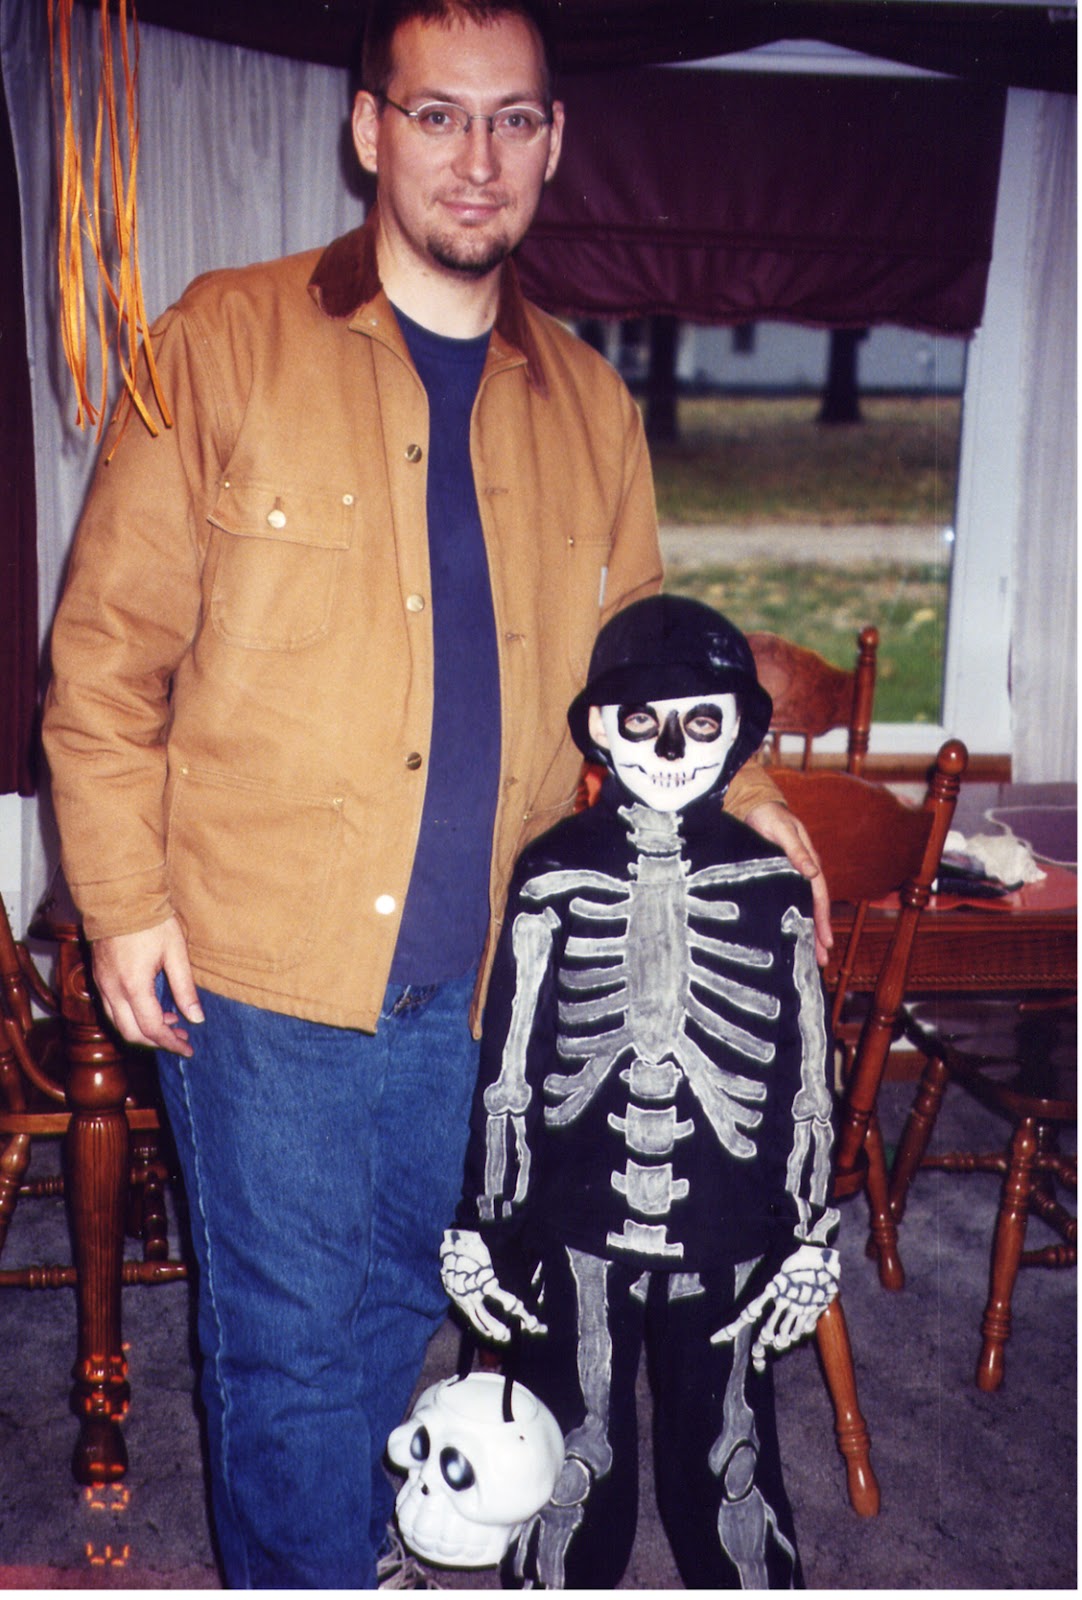
Another simple idea.  Use black sweats and paint a skeleton on the body with glow in dark paint from craft aisle.  Then buy the mask and the skeleton gloves.  He is no longer this little, neither are my other two children.  I miss those years!  Treasure them. 
 

Sunday, September 23, 2012

Little Tikes Car Transformed into Batmobile

I got this idea from a picture I saw and for a few dollars I took my $6 thriftshop little tike car and made it an awesome batmobile for my grandsons.  I bought 3 cheap black spray paint for $1 a piece at Dollar Store.  I had a can of silver Krylon that I used for the batman logo background.  You could use yellow which is the original batman logo background color.  I used what I had on hand (and our dollar store didn't carry yellow).
I started by cleaning any dirt from car. And also to help the paint stick better I did some roughing with sandpaper.  You could also use better paint or a primer and skip that step. Then I spray painted the door silver.  (step 1)
My husband made a cardboard batman lego.  After the silver paint set for a day or two, I covered the door with masking tape. (step 2) 
After that I traced the oval onto the masking tape, then cut out the bat and traced it onto center of oval.  (step 3 and 4)
I then used a utility knife to cut out the oval and removed the tape from outside oval. (step 5)
Then I used utility knife to cut the bat out, removing that masking tape, leaving only the oval covered.  (step 6)
We also spray painted the gas cap and hubcaps on wheels silver.  And covered them with masking after paint set. 
Now is the final and hardest step.  Spray paint everything not covered in masking tape with the black spray paint.  This took some time.  I tried to spray evenly so not to have runs.  And I let dry between coats.  I sprayed everything except the bottom.  I even sprayed inside including the roof.  I left the horn button red by covering it with masking.  When all is dry, carefully peel back masking to reveal the silver or yellow. (Step 7)  My 3 year old grandson loved it.  He put some scratches in it by running it into things.  If I wanted I could always touch it up...or leave it with its little scratches that came from fun and play! 
step 1


step 4

Step 2
Step 3
Step 5
step 6
step 7
Finished car
Happy Grandson!


Thursday, September 06, 2012

OLD TUBE SOCKS, DOGGIE DIY CHEW ROPES, ETC

I found purpose for my husbands old tube socks.  Our St. Benard, American Bull Dog has shredded a play rope or two, has torn the bits out of stuffed toys so I repurposed some old socks.  I cut the socks toes out, then cut the socks into about 1" strips.  Then I tied three strips into a knot at the top, proceeded to do a simple braid and tied knots at the ends.  I made 2 of these and had 2 strips left over.  So I took the two strands, left about 2" at top and kept knotting them til I got about 2" from ends and then tied the two ends into a circle.  She loves em.  And when they get shredded or just plain nasty from her saliva, I can toss em, with no buyers remorse!


I Did it Myself ~ DIY Ottoman and No Sew Roman Shade


This ottoman was a joint project with my hubby. It was made from some old under the bed storage boxes my hubby made for my grown son's room. My son has since moved out and we got rid of bed so my hubby just converted them to this upright box and hinged a top on. We then added rolling casters on bottom and I used a giant pillow on top and covered with some fabric stapled to underneath of top. And it opens for storage!

 
With additional fabric from ottomon I decided to tackle a pinterest diy project for no sew roman shades. I got the idea from http://involvingcolor.com/involvinghome/no-sew-roman-shade-from-mini-blinds/ so not to take credit for myself. Getting a great picture was another story because of lighting.